...a place to illuminate one's creative potential.

Sunday, July 31, 2011

My creative space!

If you have followed my previous posts you have probably read that I have a art/craft/studio space in my home.  I use to have my creative space on the sun porch but it was hot in the summer, cold in the winter, and very little wall space.  The thing that was great about that space was the view out of the windows at  tree level.  My husband suggested one day that I turn our little used living room into my studio.  At first, I said no but the more I thought about it the more excited I got!  We have three large living spaces in our home.  All three have fireplaces.  In two weeks, when my children both go off to college, their will only be honey and me left to ramble around in this big old house.  I have a big variety of supplies in this room.  I like to paint, collage, stitch, stamp, quilt, craft, etc.  Well, enough said.  Here is where I get to play!  The Art work in this space is my own.


Painting supplies 


My husband built the hutch 20 years ago!  He won't let me chalk paint it!

The four chairs for my high table were GW finds!  I recovered the seat bottoms.

I move the sewing machine to the table when sew.

It is nice to have a fire on cold winter days while I work !


I keep most all my sewing supplies in this old changing table/dresser.  Two drawers are full of fat quarters.


View from the foyer.

View from the office.

Left view from the office.

I got my work table from Pier 1 on the scratch and dent clearance area.  It was just what I had been looking for.  I really wanted it to have a shelf on the bottom.  I have a large basket on the shelf with cross stitch projects in it.


This is my napping couch!  I love this little sofa!

I hope you are inspired to fix up a creative space for yourself! 

Saturday, July 30, 2011

More Burlap!

I added a little burlap to my pencil storage!  I bought this band of burlap by the yard at Mary Jo's Cloth store for $.59/yd.  I found it in the drapery fabric section with all the trims.  

Before

After

Friday, July 29, 2011

Burlap and Metal

Did you know you can buy scrap book paper in burlap print?  I found some at Hobby Lobby and new exactly what I was going to do with it!  I had bought a 5 pk of magazine boxes at Ikea for $1.99 last year and have just used them in their plain white cardboard form in my art room.  A $.59 sheet of paper and one package of Tim Holts metal frames really turned them around!  They look so much nicer in the telephone booth.
Printed paper

Metal frames put on with paper brads.

Card board magazine boxes from Ikea.

Much better!

Put right back in the telephone booth.  This was an English telephone booth that my husband converted to an entertainment center years ago.  It is now in my art room and houses my TV and various supplies which I keep in vintage suitcases on the three lower shelves.

Linking to:
Savvy Southern Style

Mantle-scaping in the art room

One thing leads to another... it started with GW stools for my art table.  Which lead to recovering the seat bottoms of the stools in a bright happy fabric.  The windows needed that happy fabric too!  Then I just had to do a little playing on the mantle.  My art/craft room is actually my living room that never got used.  I live in a large house that has three large living area spaces.  All three have fireplaces.  When I complained that I did not have enough wall space on the sun porch, my wonderful husband suggested that I use the living room for my studio.  The more I thought about, the more I liked the idea!  But I knew it had to be pretty, not junked up with plastic bins and such.  I am still working on the little details to make it functional and pretty!  I love the location...right next to the office and the kitchen!

You can see the mantle in these pictures.  The art work is one of my original mixed media pieces.  The apothecary jars are filled with ribbons.  The ruler and cloche were both thrifty finds.  Maddie's picture is one of my absolute favorites of her when she was little.  Just being in this room inspires me to be creative and the process of being creative is the best high I know!


I am joining Inspiration Friday over at The Picket Fence!

Wednesday, July 27, 2011

Free!

You never know what a morning walk around the neighborhood can turn up!  I was walking with Clara at 7:30 am Monday morning when my heart did that little extra beat, you know, the feeling you get when you find something really good for free!  There beside the road waiting for the trash man was a blonde wood dresser.  A nice size with neat drawers that all worked.  One side was covered in stickers.  I knew I could do some magic on it and use it somewhere in my house.  I was afraid to leave it by the curb for too long...somebody else might get it.  I let Clara keep walking while I went back to the house for the hand trucks!  Yes, I most certainly did!  I pulled that dresser home on a pair of hand trucks from 4 houses down the street.  It was up hill!  I parked it in my garage and met back up with Clara as she was coming back around the block for lap number three!

On Tuesday, the AS Chalk Paint in Antibes Green came out and I went to painting!  I had to replace the old hardware until I can go out to find new ones.  I think they need to be black.  I placed it in my office for now.  We'll see...it will probably move a couple of times before I find just the right place.  It may even get placed at the mountain cottage.

Free dresser redone in AS Chalk paint - Antibes green with dark wax.  

I am joining Furniture Friday over at Miss Mustard Seed.

Monday, July 25, 2011

DIY Sail Cloth Pillows

While on vacation at the beach, we saw some wonderful pillows and bags made from sail boat sails.  They were way out of our price range.  I have also seen some like it at Pottery Barn...still out of my price range.  I decided to make my own version using drop cloth fabric, and sports numbers put on at a sporting goods store.  I added some zigzag stitching in nautical colors, scrap booking grommets, and part of the drop cloth seam.  I am very pleased with how they turned out!  Two more little touches to Maddie's new nautical inspired bedroom.  Big reveal coming soon!  I am linking to Wow us Wednesday over at Savvy Southern Style.

 http://savvysouthernstyle.blogspot.com/2011/07/wow-us-wednesdays-24.html


Wednesday, July 20, 2011

Summer Cloche Party

My first cloche!  I picked up this large cloche at TJ Max for $9.99 yesterday and couldn't get home fast enough to start playing!  I am posting to Marty's Summer Cloche Party at A Stroll Thru Life.

http://astrollthrulife.blogspot.com/


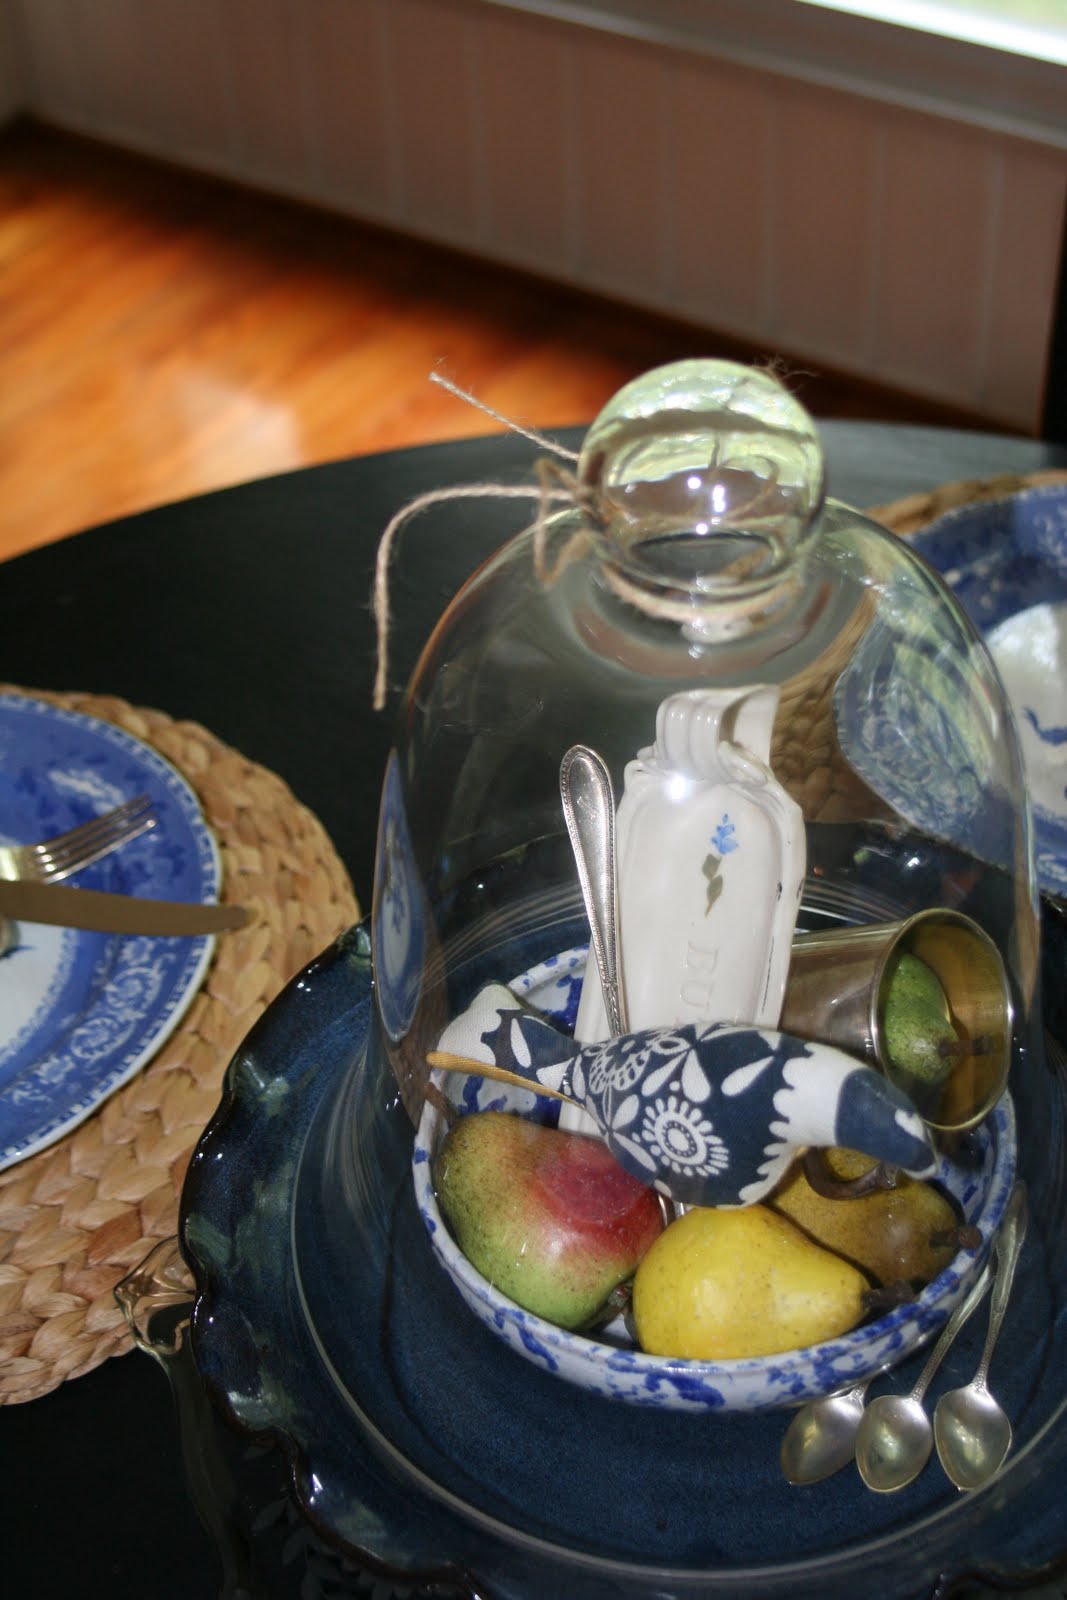
I just kept adding a few of my favorite things until I got it just the way I wanted it.  I used a Cole Sisters pottery bowl, a Bolick Pottery platter, a pottery butter dish, some odd silver utensils, and a tarnished silver baby cup.  The stuffed fabric bird came from the flea market a couple of weeks ago.  I fabric vendor uses left over fabrics to make these cute birds.  She had a huge basket of them...all a little different.  It took me 20 minutes to pick the 3 that I purchased.

Only 28 days left of my school summer vacation.  I still have way too many projects that I want to do before I go back to planning for three science classes (Biology, Anatomy, and Physical Science).  Blogging with all of you has been great fun this summer!  Thanks for all the inspiration!

Monday, July 18, 2011

A few changes

I have had some time to do a few changes around the house lately!  I've gotten to use my new chalk paints on a few frames and a rocking chair that I used when my son was a baby.
Master Bedroom

Chalked rocking chair replacing a dark plantation chair in the corner.


1st layer was aubuson blue, old white on top, clear wax.

The lamps are a redo.  They used to be brass and now they are dark blue with new burlap shades.
These next pictures are of a two part redo.  The rooster picture is a print that my husband gave me 20 years ago.  The colors were drab and outdated but I still liked the overall scene.  I took it apart and painted over the print in brighter colors, added some collaged scrapbook papers, and finished it off with some charcoal outlines.  I had two new white mats cut to replace the hunter green and barn red ones.  I put it all back together and hung it back in the same place.  I did not do anything to the frame at the time. The more I looked at it the more I thought the dark wood frame needed to be changed.  I used antibes green and old white.  It fits the kitchen color scheme now!

After: print and frame redo 

Redone print before chalking the frame.  I had already taped it off for painting in this picture.

It fits the kitchen decor much better now.  Cabinets are white and the counter tops are black.  As you can see, the walls are green apple.
I have some other ideas filling the space in my head!  I am sure a few more changes will take place in the 30 days I have left before school starts back!