
Saturday, November 30, 2013
Pine cone topiary trees
Sunday, November 17, 2013
New Pens : More Tags
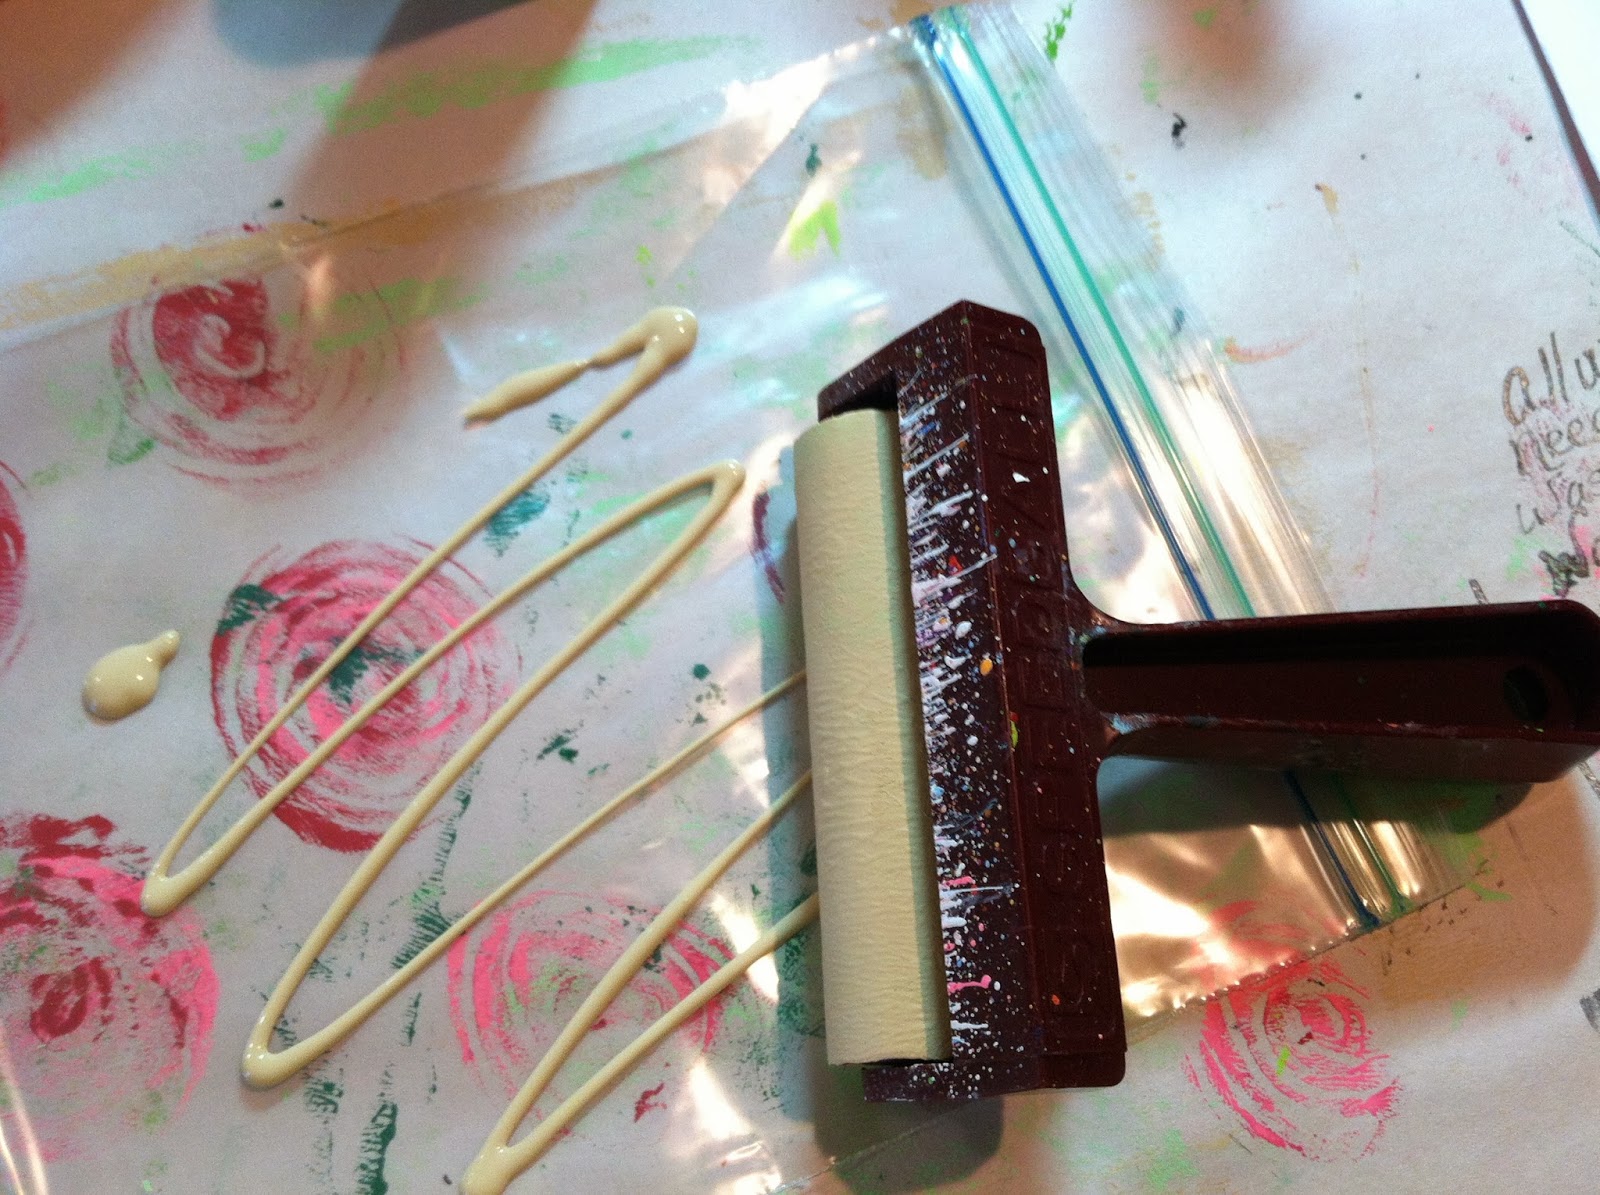
I'm still making holiday tags with baggies, but I was running into a bit of a problem with my black pens to do outlining and word writing. Gel pens would skip to much and were to thin of a width for my liking. A felt tip marker and Sharpie were not the look I wanted and were really wider widths than I thought looked good. Some black pens would start to to write and then just quit. I went on a Saturday adventure to my new favorite art shop, Donna Downey's Studio in Huntersville, NC, and bought myself a couple of new black ink tools to try out!

So here is my product review:
Krink is a an acrylic paint pen that has a roller ball applicator tip. You squeeze and write. It leaves a nice painterly line that is a wide width. Cost: $9.99
Fineline Applicator is just a bottle with a long needle like tip that you fill with the paint of your choice. It is a little hard to control because the applicator tip is so long but it leaves a very nice thin paint line when you get the hang of it. Cost: $5.00 and it is refillable!
I tried them both out on my monoprinted holiday tags with good results from both. I am leaning more toward the Fineline Applicator bottle. I like the thinner width line and the fact that I can refill the bottle with $1 craft acrylics.
 |
| No outlining |
 |
| The top Holly leaves are done in the Krink and the bottom leaves are with the Fineline. |

 |
| I am liking the line of this tool! |
So here is my product review:
Krink is a an acrylic paint pen that has a roller ball applicator tip. You squeeze and write. It leaves a nice painterly line that is a wide width. Cost: $9.99
Fineline Applicator is just a bottle with a long needle like tip that you fill with the paint of your choice. It is a little hard to control because the applicator tip is so long but it leaves a very nice thin paint line when you get the hang of it. Cost: $5.00 and it is refillable!
I tried them both out on my monoprinted holiday tags with good results from both. I am leaning more toward the Fineline Applicator bottle. I like the thinner width line and the fact that I can refill the bottle with $1 craft acrylics.
Monday, November 11, 2013
Holiday Gift Tags: Started with a zip lock bag!

I was inspired by Alisa Burke's blog last night! Check out her fabulous and colorful blog here. She has a basic picture tutorial and a quick video on monoprinting with a plastic baggie. I have been monoprinting for a couple of months now using a Gelli Arts silicon plate and love it! Monoprinting is very addictive but Gelli plates are a bit pricey. After seeing Alicia get the same printing effect using a ziplock bag, I had to try it! Wow! Totally cool and cheap way to print. I immediately thought about using this method to teach my friends how to print... better yet... a Holiday Tag Party! If my work friends are reading this post....the invitation is coming soon!
I took pictures as I worked along this morning....
 |
| Supplies: Plastic bag, craft paint, a roller, paint brush, black ink pen, and cardstock. |
 |
| Dribble a few of your favorite colors out on a palette(Piece of paper!) |
 |
| Dribble a little paint directly onto the plastic bag. Then spread the paint around with the roller. |
 |
| Draw some wavy line with the end of the paint brush. |
 |
| Flip the baggie over onto a piece of card stock. Press with fingers. Peel back the baggie. Repeat to cover your paper. |
 |
| Paint three outlines of holly leaves. Use the end of paintbrush to draw lines in the paint. |
 |
| Turn baggie over onto the paper and press. Peel back baggie. |
 |
| Use a different green and paint holly leaves again. |
 |
| Draw lines in the wet paint with end of brush. |
 |
| Turn baggie over onto paper again. You are just layering paint. No need to be perfect! Eyeball it! |
 |
| I repeated holly leaf process with one more color of green. |
 |
| Paint red dots on the plastic baggie. Draw swirl lines in the red with the end of the brush. |
 |
| Position baggie over paper and press. I did a hot pink layer the second time. |
|
| Cut the paper into tags on a paper cutter. Use a black pen to "messy" outline leaves and berries. I wrote holiday words on mine. |
 |
| I love the way they turned out! |
 |
| Here is a tag with some of my favorite holiday paper. |
 |
| Great for tying on a plain gift bag or a bottle of wine. |
Friday, November 8, 2013
My Chucks are Magic!

We are into chucks in our family, except we don't call them chucks. They're "Magic Shoes"!
Our "Magic Shoes" can take us anywhere, on any adventure our hearts and minds can imagine! Maddie's are purple, John's are red, Jesse's are grey, and mine are yellow.
We love wearing them out and about...someone always says something about them
... which gives us a chance to promote Maddie's book!
Maddie got into the mixed media paper painting last weekend.
That's her masterpiece above!

Three of us on an adventure.
Magic Shoes in the South is available on Amazon.com.

Sunday, November 3, 2013

Subscribe to:
Posts (Atom)